Account
The Account Configuration section is where you configure the various Banner accounts that have been added to IntelleCheck.
Account Code
If you are using an Oracle Banner (on-prem) installation, the Account Code field found at the top of the screen provides a list of account codes that are pulled from the GXVBANK table for Accounts Payable (AP) and PTRPICT table for Payroll (PR).
If you are using a cloud-based installation and have migrated your data over to the IntelleCheck Server Database, all data from the GXVBANK and PTRPICT tables that existed at the time of migration will have been transferred over. However, any new accounts will need to be added and configured on this page.

The Add button allows you add a new account.
The Copy button is used to copy the currently selected account in order to create a new one.
The Delete button is used to delete an account from this list.
Information
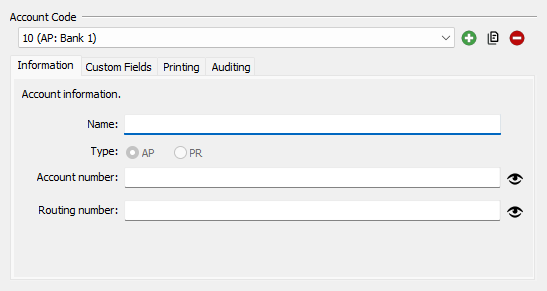
The Information tab is only visible when the IntelleCheck Server Database is selected when signing in.
- Name - allows you to name, or describe the account for better recognition.
- Type - identifies Accounts Payable (AP) or Payroll (PR).
- Account number - is used for accounts that utilize Positive Pay.
- Routing number - identifies the bank associated with this payment.
Custom Fields
When creating your check files, Evisions can add up to 10 custom check fields for each account code. These fields are defined in the fabchkp, phpchkl, or fardird .pc files, and can be used for various actions including sorting
This section allows you to associate a descriptive label with each of these custom fields.
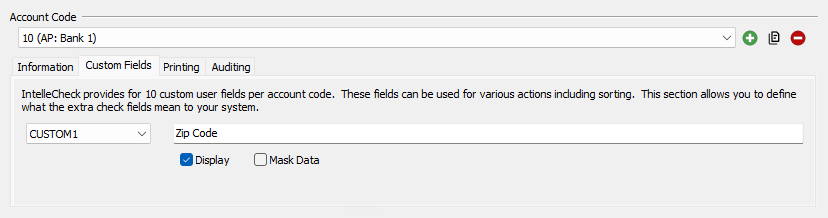
Select a custom field in the dropdown, then enter the label text for that field.
To have the custom field displayed on the Payment Selection screen, check the Display box. If the custom field contains sensitive data, such as a password, check the Mask Data box to display the field using asterisks rather than the actual data.
If you would like to add a new custom field, please submit a request to the Evisions HelpDesk.
Search
Note: the Search section is only visible when an Oracle database is chosen when signing in.
The Search for and Replace with fields are used to replace data on the check in order to create a file copy. Typically, the MICR font and signature(s) are removed and replaced with "VOID”, "FILE COPY," or something similar.
Printing
The options in this section pertain to various printer security settings.
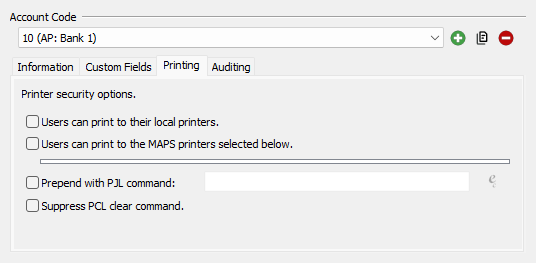
Users can print to their local printers - allows users to print to their local printers, as opposed to printers that are defined in MAPS. This is not as secure as requiring users to choose specific printers.
Users can print to the MAPS printers selected below - allows users to print from IntelleCheck. You may wish to use this option to require users to print to a specific, secured printer. Use Shift or Ctrl to select multiple printers in this list.
Prepend with PJL command - allows you insert a Printer Job Language command at the beginning of the print file.
Suppress PCL clear command - leaves the print file in the printer's memory after processing is complete. Use this setting with caution, as the print file may contain sensitive data.
Auditing
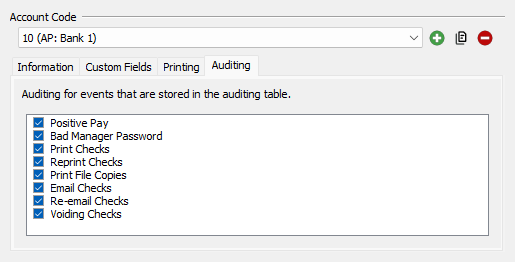
The Auditing options control the data that is stored in the auditing table for each account. The checked properties will appear in the Actions Audit report.